Video Credit: This content is sourced from Guy's Pest Solutions. We do not receive direct compensation from this creator. We feature this video because it delivers exceptional, actionable value to our community.
* This post contains affiliate links.
Skip the $100+ Professional Termite Stations — Build Your Own for Pennies
If you've ever priced out professional termite monitoring stations, you know the sticker shock. Pest control companies charge a premium to install small plastic stakes around your yard, then charge you again to "monitor" them every few months. What most homeowners don't realize is that you can build functionally superior versions yourself, for a fraction of the cost — and they'll likely catch termites faster than the store-bought or professionally installed alternative.
The secret isn't fancier bait or stronger chemicals. It's spacing.
Why Store-Bought Stations Often Miss Termites
Subterranean termites are completely blind and have no sense of smell. Worker termites leave the colony and wander in random directions searching for food. When they happen to bump into something edible, they lay down a pheromone trail so other workers can follow. In other words, termites don't "sniff out" bait stations — they stumble onto them by pure luck.
That's the flaw in most commercial systems. Professional-grade stations are expensive to manufacture and install, so companies typically space them 10 to 20 feet apart to keep costs down. That gap gives foraging termites plenty of room to slip right past a station undetected — and head straight for your house instead, since a house is a much bigger target to accidentally run into.
How to Build Your Own
The build itself is simple and doesn't require special skills, just basic tools and a bit of patience.
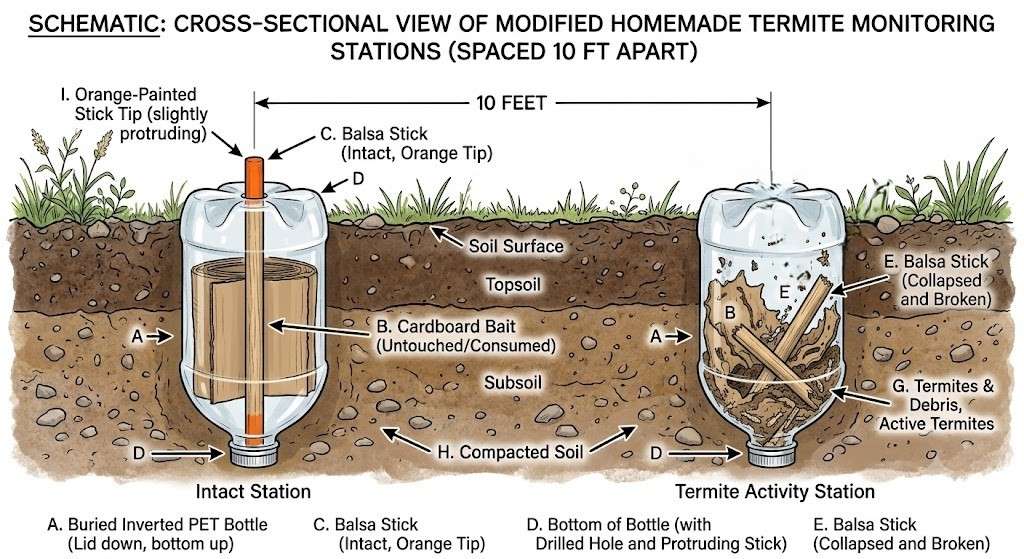
Start with a wide-mouth plastic jar. Drill a small pilot hole through the center of the lid, then widen it slightly larger than a 3/8-inch wooden dowel — just enough for the dowel to slide freely once it swells from moisture. Next, drill a matching hole through the center of a 2-inch wooden disc, sized so the dowel fits snugly without slipping. Cut your dowel in half, insert the rough-cut end into the wooden disc, then feed the factory-cut end through the lid and screw the lid onto the jar (always keep the jar horizontal while doing this, or the dowel can fall inside).
Finally, drill several rows of holes around the jar's body — these let termites in — plus a couple of small drainage holes in the bottom so water doesn't pool. That's it. You've got a working monitoring station.
Installing Them the Smart Way
Dig holes roughly 3–4 feet from your foundation, spaced 3–4 feet apart, using an auger bit sized to match the jar. Bury each station so only the cap sits at ground level — deep enough to stay hidden from mowers, shallow enough that you can still pop the lid off later. Check them monthly. If a dowel has disappeared or collapses easily when you press on it, congratulations — you've found termite activity, and it's time to swap in bait to take out the whole colony.
The tight spacing is really what makes this approach work. Because these stations cost pennies compared to commercial ones, you can afford to install them close together — dramatically improving the odds that a wandering termite bumps into one before it finds your home.
It's not a guarantee (a termite can still squeeze through the gaps), but it stacks the odds heavily in your favor, and it costs a fraction of what a pest control contract runs annually.
Bill of Materials
Item
Approx. Quantity Needed
Approx. Unit Cost
Notes
Plastic jars (wide-mouth, w/ lid)
1 per station
~$1.21/jar (24-pack ≈ $28.98)
Case of 24 covers most average homes
3/8" wooden dowels, 12" long
1 dowel = 2 stations
~$0.40/dowel (25-pack ≈ $9.99)
Cut in half per station
2" wooden discs
1 per station
~$0.08/disc (100-pack ≈ $7.95)
Anchors the dowel inside the jar
Step drill bit set
1 set (reusable)
~$7.00
Used for lid, jar body, and pilot holes
Standard drill bit (3/8")
1 (reusable)
~$3–5
For precise holes in wooden discs
Auger drill bit (jar-diameter)
1 (reusable)
~$10.00
For digging install holes
Hacksaw
1 (reusable)
~$10–15
For cutting dowels
Vice or vice grips
1 (reusable)
~$10–20
Secures discs while drilling
Sharpie, pencil, paper, scissors
On hand
Minimal
For marking centers and drill depth
Green exterior paint (optional)
Small can
~$5–10
For camouflaging stations in lawn
Estimated total for a full house (10–15 stations): under $100, most of it reusable tools.
⚠️ Important Disclaimer:This post recommends DIY termite monitoring as an effective way to catch infestations early. However, the actual termite treatment should always be handled by licensed pest control professionals. DIY termite treatments are ineffective and can leave colonies untouched while damaging your home further. Once you detect termite activity through monitoring, the next step is professional intervention.
If you've detected termites, find a qualified pest control professional in your area to handle treatment. A licensed professional can properly diagnose the infestation, treat affected areas, and provide warranties that protect your home investment. The cost of professional treatment is a worthwhile investment compared to the potential thousands in structural damage termites can cause if left untreated.
Amos is your go-to editor and pest advice enthusiast, blending years of hands-on experience into clear, practical guidance for everyday pest problems. Growing up on a farm near Grandville, Michigan, he spent his days outdoors, learning to deal with wildlife, pests, and nature in real-world settings rather than just from a textbook. That upbringing turned him into a genuine nature lover, comfortable in fields, woods, and around all the critters that come with them. Today, he channels that background into approachable, science-informed articles that help homeowners protect their spaces without overcomplicating the process. When he’s not polishing guides or answering pest questions, you can imagine him most at home outside—observing animal behavior, walking the land, and turning those observations into practical tips you can actually use. His mission is simple: to give you straightforward, reliable pest pointers so you can spend less time worrying about infestations and more time enjoying your home and yard. Check out my Profile.